
SKIP TO CONTENT
Home The Game Media FAQ Community Sign in
GET NOTIFIED JOIN THE DISCORD
THE GAME

Build turrets.
Hold the fortress.

Tower defense with roguelite runs and a loot-driven turret builder. Every kill counts three times: this second, this run, and between runs.

THE LOOP

Lobby, Hangar, the run, results. Back, stronger.

1
WORKSHOP

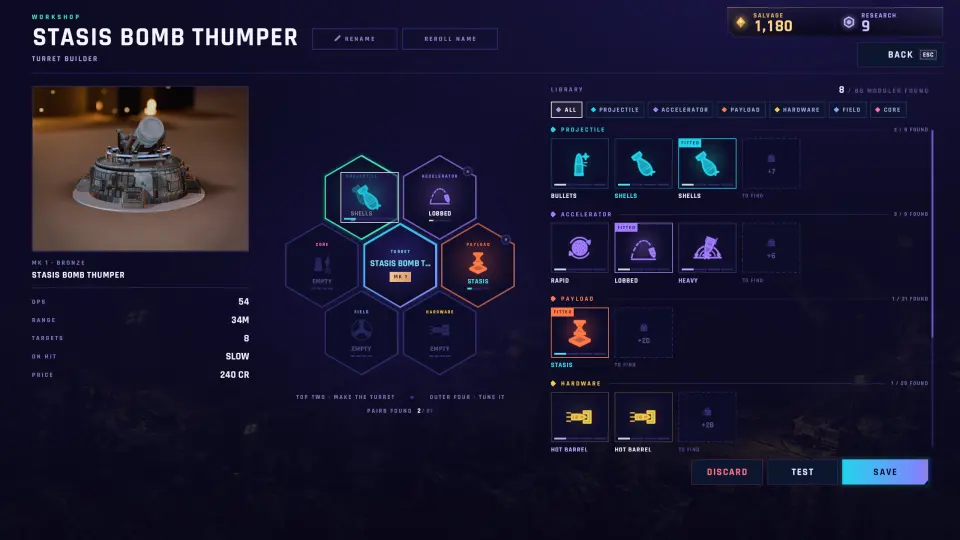
Build turrets from the modules you’ve looted: six slots, 88 modules, 15 base turrets to discover. Raise each turret’s MK with salvage.

2
DEPLOYMENT HANGAR

Pick a threat (Standard, Veteran or Nightmare), an operation length (5, 10 or 15 alerts), up to five turrets, a sector and your card deck.

3
THE RUN

Fortify, maze, mount turrets. The Hive Alert climbs as you kill. Draft cards, chain kills, trigger Overdrive. Then the sector boss arrives.

4
EVAC OR HIVE FURY

Kill the boss and the run is won. Bank it with EVAC, or stay: Hive Fury adds salvage, up to half again, and the swarm comes back tougher and denser. Then share your Turret of the Run.

The turret builder: dragging a module into a hex slot
THE WORKSHOP

You don’t pick a tower.
You build one.

Projectile × accelerator decides what the turret is: Repeater, Mortar, Rail Sniper, Tesla Arc, Phase Laser and ten more base turrets, out of 81 pairs that all fire. Payload, hardware, field and core tune it. Modules drop from Common to Legendary, plus Uniques, and you keep them for good. You start with only the Repeater and the Mortar.

TRY THE BUILDER ON THE HOME PAGE
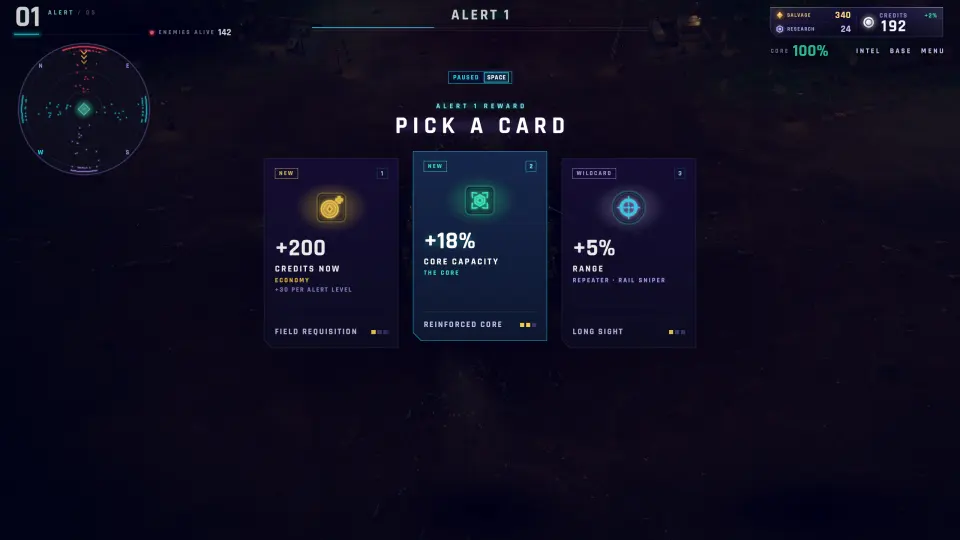
Picking an ability card mid-run
RESEARCH SPIRE

Draft cards
mid-fight.

39 ability cards in 7 families: Ballistics, Energy, Explosives, Core, Economy, Command and Field. Unlock and level them with Research, then take a deck of 8 to 12 into each run. Kills fill the draft meter; when it’s full the game pauses and you pick one of three. Bosses grant extra picks.

HOW TO PLAY · IN THE FIELD

Protect the core.
That’s the whole job.

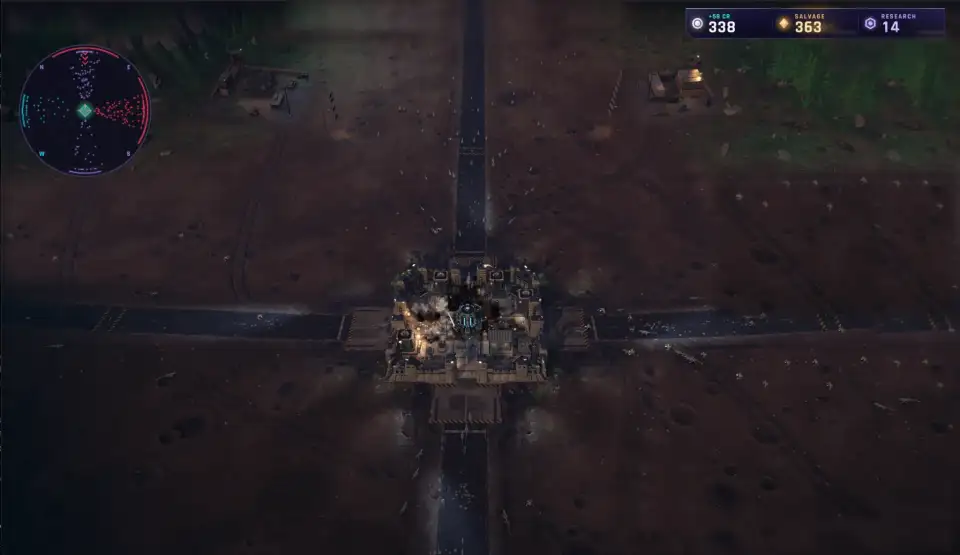
The core sits at the centre of the fortress. The swarm never stops coming. Everything you do in a run buys it time.

BUILD

Start with launch funds and earn credits by killing. Place fortifications on the grid, then mount turrets on them. Drag whole lines of foundations. You can build while paused.

MAZE

Walls bend the aliens’ path. A longer path means more time under fire, and on higher threats a good maze is what keeps you alive.

AIM

Set each turret’s range and target point, so the mortar shells the choke and the rail covers the long road.

OVERDRIVE

Press C for a short burst of raw power when a horde breaks through or the boss is on the walls. Or slot EMP Pulse, Artillery Strike or Emergency Barrier in its place.

VETERANCY

Turrets rank up from their own kills, I to XII, and earn a callsign at rank VIII. Champions arrive alone, elites and Hive Lords lead packs; all of them drop modules, and the bosses drop the best.

TEMPO

Pause or run at 1× to 5×. INTEL and BASE pages show the run and your defences; radar and edge arrows show where hordes come from.

BRING THE RIGHT TOOL

The highest DPS doesn’t win everywhere.

Every run rolls a swarm mutator (one on Standard, two on Veteran, three on Nightmare), and every sector ends with a boss. Both are shown before you deploy, so you know the question before you pick your loadout.

KINETIC EXPLOSIVE ELECTRIC FIRE ICE TOXIC
SWARM MUTATOR · 1 TO 3 PER RUNBRING
PLATED Armour cuts kinetic to 35% EXPLOSIVE
SHIELDED Shields that regrow ELECTRIC
REGENERATING Heals over time FIRE
BROOD Splits into five on death EXPLOSIVE
MOLTEN Resists fire ICE
CHITIN-SEALED Resists electric TOXIC
SECTOR BOSS · THE BUILD CHECKBREAK IT WITH
RAVAGER Leaps over your walls, double leap, spits, rends ICE
BROOD MOTHER Lays eggs, regrows FIRE
SIEGE COLOSSUS Armour plates, a huge body EXPLOSIVE
BURROWER Burrows and surfaces in bursts TOXIC
SHIELD WARDEN Projects a shield dome ELECTRIC

Bosses go for your turrets first, then the fortifications under them. Every boss telegraphs its moves.

SIX SECTORS

Same core. New ground.

Each sector earns up to three stars: a win, a win with the core above half, a win with it above 90%. Mountain Pass is where you start and the only finished sector so far; the other five are playable block-outs, each changing how the swarm reaches you.

SECTOR 01 · START HERE
MOUNTAIN PASS
4 entries · surges
SECTOR 02
THE BRIDGE
1 entry · massed
SECTOR 03
THE FOREST
8 trails · fog
SECTOR 04
THE COMPOUND
2 gates · walled
SECTOR 05
THE CANYON
1 entry · ledges
SECTOR 06
COLLAPSING DAM
breaches mid-operation
STEAM PAGE SOON · WINDOWS & MACOS

Be first to wishlist

One e-mail when the Steam page opens, one when there’s something to play, one at launch. That’s it.

NO SPAM · UNSUBSCRIBE ANY TIME · PRIVACY NOTICE